Hi Guys! I am currently on my second of nine days off, and I completely forgot it was even Wednesday today! I'll post tomorrow!
xoMegan

The things I cook for love on my days off of cooking for money.
Wednesday, October 9, 2013
Wednesday, October 2, 2013
Beef Stew For Two
Alright guys, as promised we are making beef stew today. I love anything that requires little effort, lots of inactive cooking time, and makes your house smell amazing for hours, so beef stew is the perfect dinner on this gloriously dreary October day. I'm adding chanterelle mushrooms to give it a really nice earthy flavor, and to really make it taste like fall.


As most of you know, there are only two people in my household, but I still wind up cooking enough to feed a small army. (Case in point, the giant tub of butternut squash soup I have left over in my fridge right now. I'll post that recipe soon). That's why I'm calling this recipe beef stew for two; I'm trying to make a conscious effort to cook smaller portions of food. I always tell myself I'm going to take the extra to work when I make a giant portion, but I am a total space case about things like that and it ends up just going bad in the fridge, and I end up throwing my money in the garbage. (Not to mention being super wasteful, yuck.)
So here we go, a combo deal of good cold weather comfort food, and my attempt at not making too much food: Beef Stew for Two. (Of course if you are making this for more people the recipe can be easily multiplied, and the cooking times should be the same.)


Ingredients:
1)2/3 pound chuck, cut into cubes (sold at most supermarkets as stew beef)
2) 1/2 cup flour
3) one half onion, diced
4) three cloves garlic, minced
5) one carrot, peeled and sliced into rounds
6) One cup chanterelle mushrooms, sliced
7) one sprig rosemary
8) two Yukon gold potatos, peeled and cut into one inch dice
9) 1 cup red wine
10) 1.5 cups beef broth
Directions
1) Place flour in a bowl and season with salt and pepper, and coat beef cubes in flour.
2) Heat 2 tbsp olive oil in a stock pot or Dutch oven on medium heat and brown beef cubes on all sides. Don't worry if you're getting lots of brown bits stuck to the bottom, this will give you good flavor.
3) Remove beef from the pot, and set aside. Add one more tbsp olive oil, and sauté onion, garlic mushrooms and carrot about three minutes.
4) Add wine and stock to the pan, and using a wooden spoon, scrape those brown stuck on bits from the bottom of the pan (deglazing!)
5) Place the beef back in the pot along with that sprig of rosemary, place the lid on and allow to simmer on low heat for two hours.
6) After the stew has simmered for two hours, add the potatoes and allow to simmer again for one half hour to one hour, or until the potatoes are cooked through and soft.
7) Once the potatoes are cooked, you're done!! Serve this beautiful masterpiece with a crusty loaf of bread, and be sure to remove the rosemary before you serve it.
Thanks for checking me out once again, and I'm looking forward to sharing all of my favorite fall foods with you.
Xoxo Megan
Wow, it's been a while!!
Hi guys! First off, some super exciting news! My dear and incredibly talented friend Katie Parra had me over a few weeks ago to do an Oktoberfest themed food shoot, and today we've been featured on Style Me Pretty Living! Here's the link:
http://www.stylemepretty.com/living/2013/10/02/oktoberfest-recipes-from-katie-parra/
Second of all, It's been over two months since I've posted because this summer was incredibly busy. That's the way summer always goes though. I think there are going to be lots of opportunities to sit outside and read a book, take a walk on the beach, work on a tan (yeah right), but time fills up with family visits, weddings, and for me personally, lots and lots of work events.
So I am always ready for fall, I welcome it with open arms. I'm ready to cook a stew and wear a sweater and sit inside watching movies all day without feeling bad about it. So in the spirit of fall I'm going to kick my blog bak I to high gear, starting with the beef stew recipe I will be making and posting later today.
Sorry for the extended hiatus, folks, but I'm back for good this time.
XoXo Megan
Wednesday, July 24, 2013
Roasted Potato and Cauliflower Salad
Hey dudes! Sorry I haven't posted in so long, things have been kinda busy and the weeks are just getting away from me. I'm taking this whole week off and not going anywhere (I can't handle "staycation"), and so I'm back in action!
Today I'm posting the recipe for the potato salad I brought to a BBQ on the Fourth of July. Most people who know me well will be surprised by this, as I really hate potato salad (most potato salad). I'm just really not fond of any kind of "salad" whose main ingredient is mayo. I don't like mayonnaise very much at all as a matter of fact. I'm also not a huge fan of boiled potatoes, unless I'm going to mash them. So between the mushy potatoes, the gloppy mayonnaise and the dill pickles (another one of my least favorites - I know - weirdo alert!) the traditional American potato salad is just really not my thang. The other thing about a mayonnaise based potato salad is that unless you're keeping it over a bowl of ice or in the fridge, it's just really not food safe. A few hours sitting out in the heat of summer, and it's basically just a giant bowl of food poisoning, and no one wants to spend the fourth of July barfing.
I do, however, love potatoes, love lemon, and love smoked bratwurst (specifically from Bavarian Meats in Pike Place Market - they're SO GOOD you guys!) so these are the things I used to make my own potato salad. Ditched the mayo, roasted the potatoes, and added a nice stone ground mustard and lemon vinaigrette. I also added cauliflower, just because I looked at some cauliflower when I was buying the potatoes and thought it would taste good in there too (spoiler alert - I was right!). Since I am one of those lucky bastards who works on the Fourth of July, I made the whole thing the night before and it really benefited. The resting time gave the dressing time to soak in and all the flavors to meld together, and it came out tasting damn good if I do say so myself. So here you have it:
Roasted Potato and Cauliflower Salad with Smoked Brats:
What you need:
Salad:
- 3 pounds red or yukon gold potatoes, cut in one inch pieces
- 1 head cauliflower broken down into smaller pieces
- 1 package Bavarian Meats Smoked Bratwurst.(I used three out of the five that come in the package, and we ate the other two for dinner)
- 2-3 tbsp Olive Oil
- 2 sprigs fresh Rosemary
- A few generous pinches salt. I always always use this stuff when I roast veggies, I swear I can't live without it.

- Large handful (probably about 1/2 cup) parsley, chopped
- 1 cup Parmesan cheese, grated
- Juice and zest of two large lemons
- 1/2 cup Extra Virgin Olive Oil
- 2 cloves garlic, finely minced or grated
- 4 tbsp good quality stone ground mustard
- Salt and pepper to taste
What you need to do:
- Preheat oven to 375
- Wash and chop potatoes and cauliflower (I don't peel my potatoes because I like potato skin, but if you don't, go ahead and have at it)
- Place the potatoes and the cauliflower in different roasting pans (they take different amounts of time to cook - as I learned the hard way). Drizzle both with olive oil and sprinkle with sea salt and roast until they look like this (about 45 minutes to an hour for the potatoes, about half an hour for the cauliflower)


- While the veggies are roasting away, you can deal with the bratwurst. Slice each sausage into aprox 1/2 inch slices, and place in a pan on medium heat. Let them cook until they're nice and browned and possibly a little charred around the edges. Like this:

- To make the dressing, whisk together the lemon, mustard, garlic, salt and pepper, then slowly drizzle in the olive oil while whisking (you can do this with a whisk or with a fork).
- Let your potatoes and cauliflower cool slightly, then place in a bowl with the sausage,. Add the dressing, and place into fridge to cool completely (bonus points for letting it sit overnight!).
- Add the cheese and parsley once the salad has completely cooled and it ready to be served.
It should look a little something like this:

Thanks for checking back in, I've got another few recipes stored up, so I'll probably be seeing you all before next Wednesday!
xoxo Megan
Thursday, June 27, 2013
Well guys, today I don't have a pie.
Sometimes when you're cooking, things just don't turn out the way you had planned. I did something wrong in the process of making my strawberry rhubarb ginger pie, and it turned out to be a sort of a gloppy mess. I think my mistake was cooking the strawberry rhubarb mixture before putting it into the crust, so the bottom crust got really soaked through while baking. I mean, it still tasted really good, if you only ate the top crust and the filling, it was bright, cirtusy, a little spicy from the ginger, and I used very little sugar so it wasn't overly sweet. I also added a bit of goat cheese to the crust so it would read a little savory, because pies tend to be a little too sweet for me. Someday, this is going to be a really good pie. But alas, it needs more work and the recipe is not quite ready to share yet. Sorry, dudes.
Here's a photo, it definitely looks "rustic":
That's the thing about cooking though, the thing that I love. Even though my pie turned out to be a little less than stellar, it's not the end of the world. Next time, I'll bake it differently, and life goes on. If I had made that for a party, I would have just scooped out the filling and the top crust and served it on top of ice cream or something. No one but me (and my internet friends, now), need to know that the bottom layer of crust was completely soaked through and had the consistency of Elmer's Glue. As long as you're not selling it (or posting about it on a blog), there's no reason things have to be completely perfect. Striving for complete perfection in your food is the reason I ended up crying over the pies I took to Christmas dinner (that everyone loved and were delicious). Not to say that I don't love it when something comes out and it looks like it should be on the cover of a cook book, but if not it's still (probably) going to taste fantastic, and things can always be salvaged. It's a lot more fun to cook when you're relatively relaxed, and things always turn out better when you aren't stressing yourself into oblivion.
I truly believe that everyone can cook, and it's such a rewarding thing to do. But sometimes, shit happens, and your pie turns out like shit but you eat it anyways. Then you have to write a blog post about how sometimes even the girl with the blog fucks up her pies. So don't let it put you off forever, try, try again (or pie, pie again, in this case). We all mess up sometimes, but in this day and age where so few people truly make things from scratch, your effort will still impress. Your cake is a little flat? Oh well. Life goes on, kids. The fact that you tried, and are trying is what truly matters for the home cook. That's my two cents anyway. So many amazing things have happened this week for immigration, women's rights, and marriage equality. There's no way a bad pie could put a damper on the beauty of progress.
Thanks for stopping in again, pals. I hope you all have a great weekend. Go do something fun for Pride! Hopefully next week I'll actually have a recipe to share, if not....oh well.
xoxo Megan
Here's a photo, it definitely looks "rustic":
 |
| and my super cute maxi dress from h&m. |
That's the thing about cooking though, the thing that I love. Even though my pie turned out to be a little less than stellar, it's not the end of the world. Next time, I'll bake it differently, and life goes on. If I had made that for a party, I would have just scooped out the filling and the top crust and served it on top of ice cream or something. No one but me (and my internet friends, now), need to know that the bottom layer of crust was completely soaked through and had the consistency of Elmer's Glue. As long as you're not selling it (or posting about it on a blog), there's no reason things have to be completely perfect. Striving for complete perfection in your food is the reason I ended up crying over the pies I took to Christmas dinner (that everyone loved and were delicious). Not to say that I don't love it when something comes out and it looks like it should be on the cover of a cook book, but if not it's still (probably) going to taste fantastic, and things can always be salvaged. It's a lot more fun to cook when you're relatively relaxed, and things always turn out better when you aren't stressing yourself into oblivion.
I truly believe that everyone can cook, and it's such a rewarding thing to do. But sometimes, shit happens, and your pie turns out like shit but you eat it anyways. Then you have to write a blog post about how sometimes even the girl with the blog fucks up her pies. So don't let it put you off forever, try, try again (or pie, pie again, in this case). We all mess up sometimes, but in this day and age where so few people truly make things from scratch, your effort will still impress. Your cake is a little flat? Oh well. Life goes on, kids. The fact that you tried, and are trying is what truly matters for the home cook. That's my two cents anyway. So many amazing things have happened this week for immigration, women's rights, and marriage equality. There's no way a bad pie could put a damper on the beauty of progress.
Thanks for stopping in again, pals. I hope you all have a great weekend. Go do something fun for Pride! Hopefully next week I'll actually have a recipe to share, if not....oh well.
xoxo Megan
Sunday, June 23, 2013
Sneak Peek: Local Strawberries!
Hey guys! Surprise Sunday post!
Summer is a beautiful time of year in the PNW, obviously, and it's also the time of year when I bite into a local strawberry and realize every other strawberry I've eaten the rest of the year was total bullshit. You can fool yourself a little, macerating them in sugar or dipping them in chocolate, but when it comes right down to it, nothing compares to something picked that morning and grown less than a hundred miles away. They'r red right down to the middle and so incredibly juicy that all the dry and white centered berries I've eaten throughout the year circle through my mind and I vow to never subject myself to anything other than utter strawberry perfection.
With this in mind, I'm dedicating this week to all things strawberry and will (hopefully) have some lovely recipes to share. The best thing to do with a nice ripe berry is just to eat it, but a nice cocktail isn't a bad way to enjoy them either. Strawberry rhubarb basil margarita?! Don't mind if I do (or you do either).

To make this little beauty I just took a handful of strawberries and a handful of chopped rhubarb and stuck it in a pot with the juice of one lemon, a little water, and a couple tablespoons of sugar. Let that cook down for a bit, until it's nice and juicy and you have a syrup (not so long that it turns into jam, although I did that by accident and all hope was not lost). Strain it to take out the chunks and seeds, and then mix it with about a quarter cup lime juice, a tablespoon of agave nectar, and pour over ice. Add your tequila, I did about a shot, but use less or more to suit your taste (or mood, I'm not judging). The final step is to add a few leaves of chopped basil, stir it up and drink it! (Note: If you cooked most of the liquid out of your strawberry syrup, you can just add a bit of water).
Another super simple thing you can do with strawberries is to throw them in a salad. This is something my mom makes, and despite how incredibly simple it is, people will die for it at a dinner party or barbecue. I don't much believe in bottled salad dressing (not because I'm pretentious, but because it's so easy and cheap to make your own), so I just use nice balsamic and olive oil, whisked together with garlic, salt and pepper. Pour that over spinach or mixed greens, and top with sliced strawberries and crumbled goat cheese and toasted nuts (almonds, walnuts, hazelnuts, GO NUTS!) and you have it. Here's mine, there's not much artistry to the photo, because it was sitting next to a steak, and I was hungry.

Thanks for coming back again, and I'll see you Wednesday for some more things to do with all those local berries.
xoxo Megan
Summer is a beautiful time of year in the PNW, obviously, and it's also the time of year when I bite into a local strawberry and realize every other strawberry I've eaten the rest of the year was total bullshit. You can fool yourself a little, macerating them in sugar or dipping them in chocolate, but when it comes right down to it, nothing compares to something picked that morning and grown less than a hundred miles away. They'r red right down to the middle and so incredibly juicy that all the dry and white centered berries I've eaten throughout the year circle through my mind and I vow to never subject myself to anything other than utter strawberry perfection.
With this in mind, I'm dedicating this week to all things strawberry and will (hopefully) have some lovely recipes to share. The best thing to do with a nice ripe berry is just to eat it, but a nice cocktail isn't a bad way to enjoy them either. Strawberry rhubarb basil margarita?! Don't mind if I do (or you do either).
To make this little beauty I just took a handful of strawberries and a handful of chopped rhubarb and stuck it in a pot with the juice of one lemon, a little water, and a couple tablespoons of sugar. Let that cook down for a bit, until it's nice and juicy and you have a syrup (not so long that it turns into jam, although I did that by accident and all hope was not lost). Strain it to take out the chunks and seeds, and then mix it with about a quarter cup lime juice, a tablespoon of agave nectar, and pour over ice. Add your tequila, I did about a shot, but use less or more to suit your taste (or mood, I'm not judging). The final step is to add a few leaves of chopped basil, stir it up and drink it! (Note: If you cooked most of the liquid out of your strawberry syrup, you can just add a bit of water).
Another super simple thing you can do with strawberries is to throw them in a salad. This is something my mom makes, and despite how incredibly simple it is, people will die for it at a dinner party or barbecue. I don't much believe in bottled salad dressing (not because I'm pretentious, but because it's so easy and cheap to make your own), so I just use nice balsamic and olive oil, whisked together with garlic, salt and pepper. Pour that over spinach or mixed greens, and top with sliced strawberries and crumbled goat cheese and toasted nuts (almonds, walnuts, hazelnuts, GO NUTS!) and you have it. Here's mine, there's not much artistry to the photo, because it was sitting next to a steak, and I was hungry.
Thanks for coming back again, and I'll see you Wednesday for some more things to do with all those local berries.
xoxo Megan
Wednesday, June 12, 2013
Snack Dinner with Artichoke Dip
Hello again, happy Wednesday!
This has been a very frustrating week for many reasons, and I unfortunately spent a lot more time hosting my own personal rage induced pity party than I did coming up with something to make for you today. Then yesterday I got to spend an incredibly rejuvenating and very much needed day with my family. I know I can count myself as one of the lucky ones that I don't have to dread once a year visit with estranged relations, but instead get to look forward spending a day with people who I don't just love, but actually like. Yesterday I got to meet the newest addition to our big crazy clan at only two days old and visit the home of my aunt and uncle who have just moved back to the area after seven years away. The day ended with sandwiches with my parents, aunt, boyfriend, and brothers on their deck. There was a moment, laughing with my brothers about something that we've laughed about so long none of even remembers how it got started that the stress of my week left me, and I just felt profoundly privileged for the people in my life. The ones I've chosen and the ones that were chosen for me.
Now, you're probably wondering why I'm rambling on about my family on a recipe for artichoke dip. This makes no sense now, but I promise you it will in a bit. You see, my mother is an amazing woman, and the kind of person who, throughout my entire childhood, even after going back to work, made the family a home cooked meal damn near every night and still does. I, unfortunately, was the world's pickiest child, and denied myself those warm childhood memories of mom's pork roast because I decided to be a vegetarian at about the age of two (that's not a joke, I was a weirdo). So, some of my favorite food memories are from when I was in high school and the six minutes I attended college, and having "snack dinner" with my mom. Snack dinner would happen when we didn't know what we wanted for eat, but were still definitely very hungry, so we would just go to the store and buy crostini and brie and apples and candied hazelnuts and spinach dip and sometimes even cheesecake. Then we'd eat leisurely on the deck, or while watching a movie, and enjoy the time we got to catch up.
This happens to still be one of my favorite ways to eat, just little bits and bobs all piled together on a plate. I try not to do it all the time, but the fact is, even though I love to cook and do consider it my greatest passion, sometimes after work I am just too damn tired. So I let the cheesemakers, and the salami curers and the olive pickers do the work for me. This is where the artichoke dip recipe comes in. I didn't just want to post a picture of me eating cheese and crackers, and I have had someone ask me to put this recipe up (Hi, Brian!), so I settled on the dip. This is one of the easiest things in the world to make, it's terrible for you, and it's delicious. I've taken this to parties and two of my friends have literally made themselves sick eating so much of it (so watch out). So tonight, to cap off my great weekend, and prepare myself for the possibly tumultuous week ahead, I'm having snack dinner with artichoke dip, some great bread, pears, olives, melon, and a nice hard cider.
Artichoke Dip with Peppadews
Ingredients:
- 6 oz sharp cheddar, grated (this will yield you about two cups of shredded cheese)
- 1 cup grated Parmesan, plus 1/4 cup
- 1 cup mayonnaise (I don't particularly care for mayo, so I like to use just enough to keep it together, not so much that it's super gloppy)
- 1 14 oz can artichoke hearts (I'm all for fresh cooking, and god bless the soul who cooks and cleans artichokes for a dip but it's sure not me)
- 1/2 cup finely minced onion
- 1 clove finely minced garlic
- 1/2 cup red peppadews, chopped (Most any peppers in brine will work, or if you want more heat and are not a wimp like me, fresh hot chilies will work as well)
- Pepper to taste
Directions
- Preheat oven to 400 degrees
- Mix all ingredients together in a large mixing bowl, adding the mayo last.
- Grease an 8x8 pan (or something close to that size, I'm making minr in a pie dish) and pour dip mixture in in to pan, topping with 1/4 cup shredded parm.
- Stick it in the oven and let it go for about a half an hour, or until it's all brown and bubbly and it looks like this.

- Oh, and also, don't forget to let it cool down. That shit is molten right now and will burn your mouth to smithereens.
That's all she (I) wrote for this week pals. Thanks for checking in again, and I'll see you next Wednesday!
xo Megan
Wednesday, June 5, 2013
Cold Tuscan Melon and Cucumber Soup
Hey dudes, happy Wednesday!
I didn’t
post anything last week, and I’d like to say that it was for some glamorous
reason like a wine tasting trip to Napa, but alas, the real reason is that my
paycheck was delayed by a day and I was flat broke. So instead, I spent the day
sitting inside and watching Nashville and doing laundry.
I did
think a lot about what I was going to make though, and because the weather was
gray and drizzly I decided on roasted chicken and potatoes. It sounded light
enough for spring, but comforting enough to help shake off the weather. I
bought the chicken and wine and everything (actually Dallas did), but then it
got hot again. I currently have a pretty decent a sunburn,
and the thought of even having the oven in our small apartment on long
enough to cook a whole chicken makes me sweaty. So, the little bird is waiting in the freezer until
it starts raining again, and I sought after making something a little more cool and refreshing.
When it's really hot outside, and especially when my skin looks a lobster (I was wearing sunscreen, I swear) , I just don't want to eat hot food. This is something that I picked up from my dad. Whenever it was really hot, my mom would make sandwiches or pasta salad or something else cold because "you know your dad hates hot food on hot days". So with that in mind, and in the spirit of turning in to one's parents, I got to thinking about what would lend the ultimate amount of cool delicious freshness while also providing a little nutrition to keep me going.
What I ended up making is a cold melon and cucumber soup with Greek yogurt. I've made this a few times before and it's perfect or hot weather. It's super light, crisp, and cold, but the yogurt gives you a little protein so it's not completely insubstantial. Serve it with a toasted or grilled baguette, and you're in business! It would also serve as a great side dish to grilled fish or shrimp. So here's the recipe, hope you guys like it.
Cold Tuscan Melon and Cucumber soup

Ingredients:
- One large seedless cucumber, or two regular cucumbers, seeded and peeled


- One half Tuscan Melon (you can use whatever kind of melon you like best, but Tuscan's were on sale, and doesn't it make this recipe sound fancier?!) skin and seeds removed

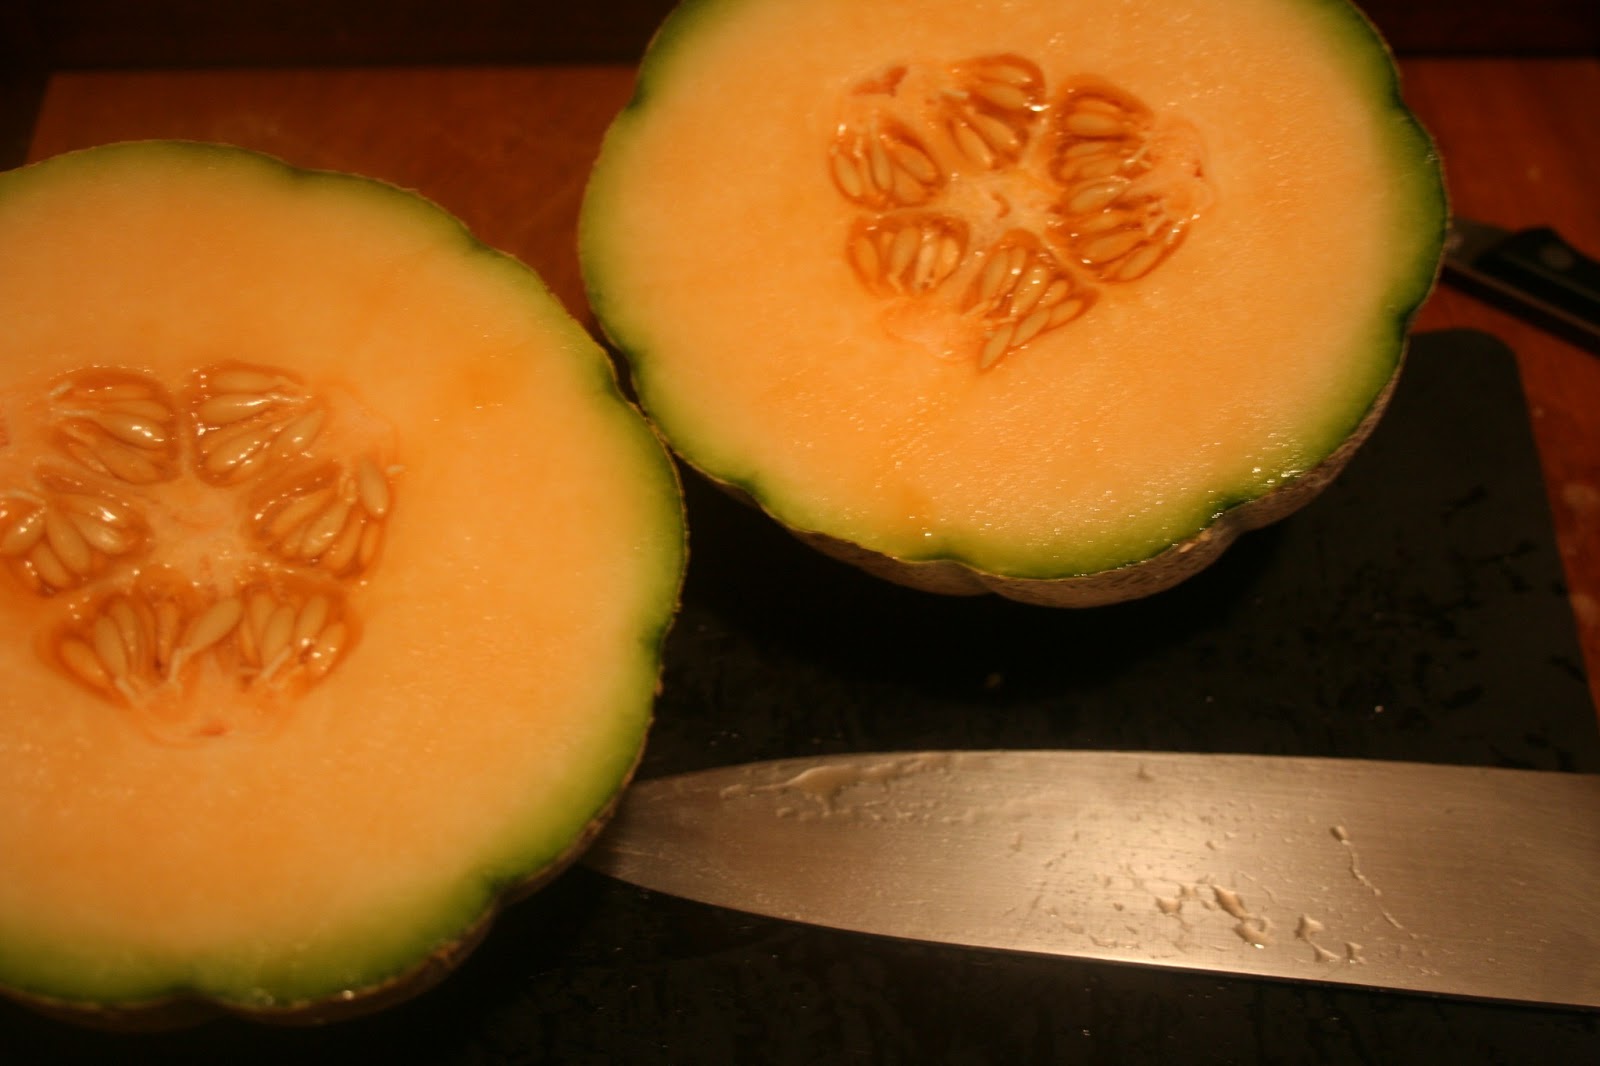
- Large handful of mint leaves, about half cup
- Juice and zest of one lime and one lemon
- Four scallions, chopped
- Two tbsp Extra Virgin Olive Oil
- Three quarter cup full fat Greek Yogurt
- Salt and Pepper to taste
Directions
- This one's really easy, y'all. You pretty much just chop everything up and throw it in the food processor.
- Let it go for a good while, until it has a pretty smooth consistency, then drizzle in the olive oil. Lastly add the Greek Yogurt.
- This step is optional, but if you let the soup sit in the fridge for a couple of hours the flavors will really start to settle, and it'll be extra chilly.
- Serve that beautiful mess in a bowl and top with a dollop (ew, I hate that word) of Greek Yogurt, and a fresh mint leaf.
- (Optional, toast a baguette to be served with the soup)
Well that's all she wrote for today folks, I'm gonna go find something to do in this beautiful sunshine. Hope you are all having a great week!
Xoxo Megan
Wednesday, May 22, 2013
Beet Salad with Couscous

Happy Wednesday, internet friends!
I was having a little trouble deciding what to make for this week's recipe. I wasn't feeling particularly inspired, and didn't have anything specific in mind. I was nursing a bit of a karaoke related hangover yesterday, so that may have contributed to my lack of ideas. So, I went to the store to look around and get a little inspiration. Cruising through the produce department, I spotted some gigantic beautiful beets, about the size of large grapefruits.
Seriously, look at these gorgeous bastards:

Beets are one of my absolute favorite vegetables, and I always describe them as dirt candy. (There was a girl on Iron Chef America recently who has a restaurant by that name, cementing my suspicion that there is truly nothing that hasn't already been thought of by someone else.) Anyhow, I love the earthy, dirty, sweet flavor of beets and I would basically eat them any which way. Maybe I'll finally try pickling some this summer - stay tuned! When I got home from the store, I was still sort of struggling with what to actually make with them, so I did the best thing one can do in these situations and just looked through what I already had in my fridge and pantry. I love doing this - it's like your own mini version of Chopped. I had some couscous in the cupboard (this salad would also be good with quinoa, which is what I wanted to make, but tragically, was out), and an onion and mint in the fridge. I settled on a nice couscous and roasted beet salad, and sent the ever supportive and amazing Dallas back out to the store to pick up some citrus, feta, a sweet potato, and a diet coke. The coke isn't necessary for the recipe ;).
This salad is really along the lines of what I cook on a regular basis, it's easy, healthy, and you get to sit down while the veggies and couscous are cooking so it's great to make after work! It also tastes great hot or cold, and makes nice leftovers to take to work throughout the week.
Here's the recipe, I hope you all enjoy!
Couscous and Roasted Beet Salad with Three Citrus Dressing
Ingredients:
Salad:
- Two large beets. I used one golden and one purple
- One large sweet potato
- One quarter of a white onion, sliced
- One half cup feta cheese, crumbled
- One cup couscous, cooked to package directions
Dressing:
- Juice and zest of a lemon, lime, and orange
- 4 tbsp Extra Virgin Olive Oil
- 1/2 Tsp Paprika
- 1 tbsp Fresh Mint, Julienned (just means to cut into thin strips)
- Salt and Pepper to taste
Directions:
- Preheat oven to 400 degrees.
- Wash and peel the beets and sweet potato, and cut into aprox. 1-inch cubes.

- Place all your root veggies into an oven safe dish along with the onion. Drizzle with olive oil and sprinkle with salt and pepper.
- Place into the preheated oven, and roast for about a half hour, or until tender and slightly charred around the edges.

- While the veggies are in, cook your couscous according to the package. I usually just throw mine in the rice cooker.
- Next prepare the dressing. Zest the orange, lemon, and lime, and squeeze out all that delicious juice. Add salt, pepper, and paprika, and then whisk it all together while slowly drizzling in the olive oil.

- Now all you have to do is let it all cool down a little bit, and mix it all together. (and eat it!)


Thanks for checking me out once again, and in conclusion:

Wednesday, May 15, 2013
Cream Cheese Brownies with Stout

I hadn't intended on making these brownies the focus of this week's post, but they turned out so damn good, I just couldn't help myself. We have an event at work with Pike Brewery coming up next month, and I became obsessed with the idea of making a brownie with their XXXX Stout. I'd seen Guinness cakes and things like that before, that's not quite what I had in mind. I wanted something a little more dense and rich, because the XXXX Stout packs a punch; it's dark and much hoppier than Guinness. The brownies end up a bit on the cakey side, but still quite decadent and the stout sticks around just enough to remind you it's there.
I found a cream cheese brownie recipe that I copied down from someplace or the other about four years ago, and I thought I could tweak it to make it fit my idea quite nicely. I thought I might end up having to make a few batches until I could find the right balance, but lucky for me, the first one turned out pretty awesome. I naively thought that one batch would be enough for me and Dallas, AND to share with my coworkers tomorrow, but what a fool I was. Two days later, and they're all but destroyed. Dallas "isn't even a sweets guy", but he definitely liked these bad boys. Lucky for us, they're quick and easy to whip up, and I forgot to take pictures the first time anyway.
So here goes batch number two of:
Cream Cheese Brownies with Pike XXXX Stout
Ingredients:
Brownie Layer:
- One cup Pike XXXX Stout
- 4 oz Semisweet Chocolate, chopped
- 1 1/3 Cup Brown Sugar, divided
- 2 Eggs
- 1/2 Cup Butter, room temperature
- 3/4 cup All Purpose Flour
- 1 tsp Salt (I used a course sea salt, for a crunchy, salty surprise!)
Cream Cheese Layer:
- 8 oz (1 package) Cream cheese, room temperature
- 1/4 cup Brown Sugar
- 1 egg
Directions
- Preheat oven to 350.
- Place Beer in a pot on medium heat, add 1/3 cup brown sugar and reduce by half. This should take about twenty minutes. (The beer mixture will be thick enough to coat a spoon.)

- While the beer is reducing, you'll have time to mix up the cream cheese layer. Just simply beat the cream cheese, egg, and sugar together until fully incorporated. (You'll also have time to drink some of that leftover stout too if you so choose, I chose that.)

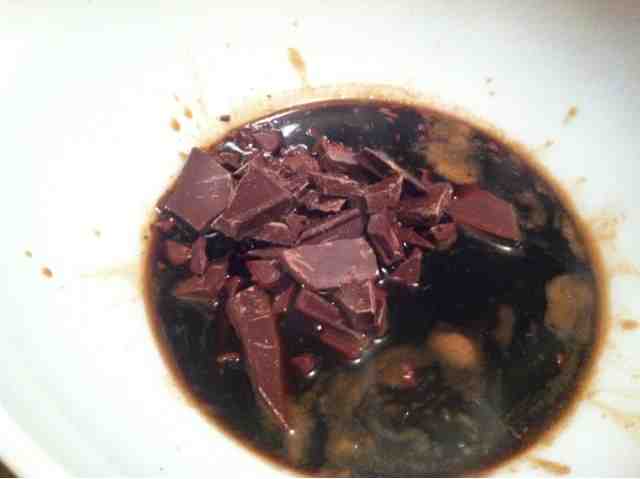
A food processor totally isn't necessary, but I have one and was feeling lazy. - Once the beer is fully reduced (to be on the safe side, measure to make so you have a half cup of liquid) remove the pan from heat, and pour into a bowl.
- Add the chocolate and stir until it's melted. The liquid will be warm enough to melt the chocolate so you won't have to mess around with double boilers or any of that.

- Add the eggs, sugar and butter. Beat until incorporated.

- Add flour and salt last, and beat until the mixture is nice and smooth.

- Pour batter into a greased 8x8 pan.

- Spoon the cream cheese mixture over the top of the batter, do not stir.

Looks weird now, but just hang in there. - Use a knife to draw a few lines through batter. This will mix them up just enough, and make it look real pretty.

Still looks kind of weird... - Now we're done! Just bake it for thirty minutes, or until a toothpick comes out clean from the middle, and let cool completely. (Or don't and burn your mouth cause you just can't wait, like I did.)


 |
| Boom! |
Thanks for coming back, and once again, if you make the recipe let me know how it turns out!!
Wednesday, May 8, 2013
Asparagus Pesto
Welcome back, and thanks a million for checking me out!
Our weather this week has been incredible, and it’s getting me really excited for summer and all the local produce that comes along
with it. It’s easy to forget how beautiful it is here in the PNW through the
long rainy months, but when it’s warm (87 degrees in May?! Hello, climate
change), and we begin to see locally harvested fruits and vegetables that all
becomes worthwhile. It’s still pretty
early in the season and most everything is being brought in, but we do
have locally grown Asparagus!
Asparagus is one of my all-time favorite foods, and one of
the vegetables I actually remember liking as a painfully picky child. Normally,
I just trim off the ends, drizzle with a little olive oil, sprinkle with sea
salt and pop it in the oven until its super crispy and almost burned. Never
boil, never steam. I know some people like it that way, but I am perfectly
convinced that the reason so many people think they don’t like vegetables is
because they have never tried them roasted.
Anyhow, back to the recipe. I didn’t just want to roast
asparagus because that’s boring. Also,
you guys are not stupid and could figure out how to do that yourselves. So I
got to thinking about a way to use the ingredient raw to preserve the fresh
flavor, and immediately thought of a pesto.
So here it goes:.
Megan’s Toasted Walnut and Asparagus Pesto:
·
6-8 Thick Asparagus stalks (if you have very
thin asparagus, use about double)
·
½ cup
toasted walnuts (pine nuts are mad expensive!)
·
½ cup Italian Parsley (for freshness)
·
2 cloves garlic (more or less to taste)
·
½ cup freshly grated parmesan (I actually used
another Italian cheese called Piave Del Tempo that I already had in my fridge)
·
Juice and zest of half a lemon, or more to taste
·
¼ cup Extra Virgin Olive Oil
·
Salt and Pepper to taste
1)
Wash Asparagus (duh), and trim the tough ends. I
just snap it off, and it usually breaks right where it needs to. Chop asparagus
into approximately one inch pieces.
2)
Toast walnuts by placing them in a dry pan on medium heat.
Watch them closely, because they burn quickly, and remove when they become
fragrant.
3)
Place all ingredients except olive oil into a
food processor. (A stick blender is a nice less expensive option for small jobs
like this one.) Scrape down when necessary.
4)
Once all ingredients are incorporated and
asparagus is finely minced, drizzle olive oil while pulsing food processor until you have a smooth
consistency (adding more than one quarter cup if necessary).
5)
If it looks like this, you’re done! Good job!
 |
This pesto is great on fish, chicken, pasta or incorporated
into a salad dressing.
I tried mine out on pasta with crumbled bacon some of that roasted asparagus I was talking about earlier (this pasta can be served hot or cold, and would make excellent leftovers) :
 |
| Served right out of the pot so I don't have to do more dishes. |
And on a toasted baguette with fresh ricotta:
 |
| Garnish with roasted asparagus tips if you have exta. |
I hope you guys liked the recipe, and if you decide to make it please let me know how it went!
Thanks for stopping by, and see you next Wednesday.
Sunday, May 5, 2013
First Post.
Welcome to my first ever blog post.
I decided there weren't enough food related blogs on the internet, so I had better remedy that by starting one of my own. As this is my first entry, I don't have any beautiful photos or recipes to share, but rest assured those are on the way.
I doubt anyone will ever read this who doesn't already know me, but just in case, here's a little back story:
My name is Megan, I live in Seattle, and work doing cooking demonstrations and events at a wonderful local grocery store. I feel incredibly lucky that I get to make a living cooking and talking about food, but I want to share a bit of what I cook, eat, and think about on my off time (and maybe sometimes the music I'm listening to while doing so). My plan is to post every Wednesday, as this is my day off and when I usually have time to cook something aside from roasted chicken and veggies (or order take out).
That's it for now, but check back this Wednesday (if you feel like it), for my first real post with recipes and everything.
I'll leave you with this :
“This is my invariable advice to people: Learn how to cook- try new recipes, learn from your mistakes, be fearless, and above all have fun!”
- The inspirational, incomparable, and timeless Julia Child.
“This is my invariable advice to people: Learn how to cook- try new recipes, learn from your mistakes, be fearless, and above all have fun!”
- The inspirational, incomparable, and timeless Julia Child.
Subscribe to:
Posts (Atom)